These micro scissors are recommended for microscopic dissections. Browse our full selection of spring scissors below or choose a sub-category above to narrow down the list.
Tip dimensions of spring scissors Most of our spring scissors are available in two tip sizes. Tip dimensions indicated in the short product description below the part number refer to the length of cutting edges followed by the tip width of a single tip. See our Vannas Spring Scissors category to find the finest scissors. 52130-04 and 52130-05 have the thinnest, needle-point tips. Actual blade and tip dimensions may slightly vary from the specifications because these scissors are made by hand and they may have to go through several phases of adjustments until they reach perfection. Blade shape and angle of spring scissors Most spring scissors are available with straight or curved blades. The cutting edges of straight blades can be oriented many different ways. Standard straight blades will cut in a straight line forward and the blades move (opens and closes) in the same plane the handles are pressed together. Blades that are angled on the edge cut in the same plane in which the handles move but they are angled from the handle’s axis (point up or down). Blades that are angled on flat are angled from the plane of the handles (point sideways). Micro scissors with SureCut blades Our new Castroviejo and Noyes scissors with SureCut blades have razor-sharp blades. The cutting ability of these blades added to the precise shearing action ensures effortless, clean cuts. Visit our SureCut Scissors category to see all of our scissors with SureCut blades. Scissors with special tips Some scissors have blunt tips in order to avoid unintended damage to tissue. Fine artery scissors have a small, smooth ball point on one tip. The ball prevents the blades from piercing through vessels so that damage to the underlying structure can be avoided. Micro scissors with unique handles If the procedure requires frequent rotation of the blades, a pair of scissors with special round handles can prevent hand fatigue. Instead of constantly rotating the wrist, the direction of round-handle scissors can be changed by simply rolling them between the fingers. Some scissors have long, pencil-like handles and blades on a narrow shank to allow reaching through small portals and working farther away from the hand.
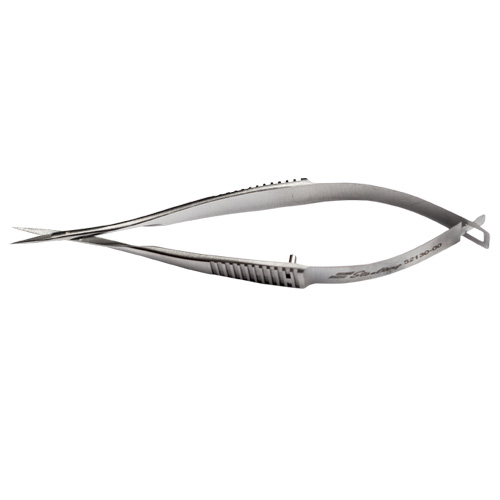
The Vannas spring scissors are generally the smallest scissors available. The smallest cutting edge is 3mm, available on several different scissor configurations (see the 52130-04, 52130-05, 52130-10,and 52130-11). The smallest combined tip width is 0.2mm (available on the 52130-20 and 52130-22). The 52130-04 and 52130-05 are recommended for microscopic dissection.
General Cleaning & Sterilizing Techniques
Summary: The following are guidelines of Cleaning, Sterilizing & Maintaining surgical instruments.
Use of distilled or deionized water and a neutral pH cleaning solution is recommended for all these procedures.
1. Rinsing-
Immediately after surgery, rinse instruments under warm (not hot) water. It may be helpful to use a nylon toothbrush to rinse the lock boxes and joints of the instrument. Be sure to remove all blood, body fluids, and tissue.
2. Cleaning-
If you do not clean your instruments immediately after rinsing, instruments should be submerged for a in a solution of water and neutral pH (7) detergent.
A. Ultrasonic Cleaning-
We recommend you manually clean micro & delicate instruments.
Instruments should be processed in a cleaner for the full recommended cycle time- usually 5-10 minutes.
Place instruments in open position into the ultrasonic cleaner. Make sure that sharp blades such as scissors, knives, osteotomes, etc. do not touch other instruments.
All instruments have to be fully submerged.
Do not place dissimilar metals (stainless, copper, chrome plated etc.) in the same cleaning cycle.
Change solution frequently, at least as often as recommended by the manufacturer.
Rinse instruments after ultrasonic cleaning with distilled or deionized water to remove ultrasonic cleaning solution.
B. Automatic Washer Sterilizers-
Follow manufacturers’ recommendations. Make sure instruments are lubricated after last rinse cycle and before sterilization cycle.
C. Manual Cleaning-
Most instrument manufacturers recommend ultrasonic cleaning as the best and most effective way to clean surgical instruments, particularly those with hinges, locks, and other moving parts. If ultra sonic cleaning is not available observe the following steps.
I. Use stiff plastic cleaning brushes (nylon etc.).
Do not use steel wool or wire brushes except specially recommended stainless steel wire brushes for instruments such as bone files, or on stained areas in knurled handles.
II. Use only neutral pH (7) detergents. If not rinsed off properly after cleaning, low pH detergents will breakdown the stainless protective surface and cause black staining.
High pH detergent will cause surface deposit of brown stain (this deposit may look like rust) which will also interfere with smooth operation of the instrument.
III. Brush delicate instruments carefully and, if possible, handle them totally separate from general instruments.
IV. Make sure all instrument surfaces are visibly clean and free from stains and tissue.
This is a good time to inspect each instrument for proper function and condition.
Check the following:
Scissor blades glide smoothly from open to closed (they must not be loose when in closed position). Test scissors by cutting into thin gauze. Three quarters of the length of the blade should cut all the way to the scissor tips, and not hang up.
Forceps should have properly aligned tips.
Hemostats and needle holders should not show any light between the jaws. They should lock and unlock easily and the joints should not be too loose. Check needle holders for wear at the tips.
Suction tubes should be clean inside.
Retractors should open, close and lock properly.
Blades of all cutting edges should be sharp and undamaged.
V. After manually scrubbing instruments, rinse them thoroughly under running water (distilled water is best). While rinsing, open and close scissors, hemostats, needle holders and other hinged instruments to make sure the hinge areas are rinsed out, as well as the outside of the instruments.
3. After Cleaning-
If the instruments are to be stored, let them air dry and store them in a clean and dry environment.
4. Autoclaving-
If instruments are to be reused or autoclaved:
A. Lubricate all instruments which have any metal to metal action such as scissors, hemostats, needle holders, and retractors.
Lubricants such as instrument milk are best. Do not use WD-40 oil or other industrial lubricants.
B. Use disposable paper or plastic pouches to sterilize individual instruments. Make sure you use a wide enough pouch (4” or wider) for instruments with ratchet locks such as needle holders and hemostats so the instrument can be sterilized in the open and unlocked position.
If you are autoclaving instrument sets unlock all instruments and sterilize them in an open position. Place heavy instruments at the bottom of the set (when two layers are required).
Never lock an instrument during autoclaving. It will not be sterile as the steam cannot reach the metal to metal surfaces. The instrument might develop cracks in hinged areas caused by the heat expansion during the autoclave cycle.
Do not overload the autoclave chamber. Pockets may form that do not permit steam penetration. Place a towel on bottom of pan to absorb excess moisture during autoclaving. This will reduce the chance of getting “wet packs”. Make sure the towels used in sterilization of the instruments have no detergent residue and are neutral pH(7) if immersed in water. The residue of the inexpensive, high-pH (9-13) detergents used by some laundries to clean the towels could cause stains on some instruments.
CAUTION: At the end of the autoclave cycle- before the drying cycle- unlock the autoclave door and open it more than a crack about ¾”. Then run the dry cycle for the period recommended by the autoclave manufacturer. If the autoclave door is opened fully before the drying cycle, cold room air will rush into the chamber, causing condensation on the instruments. This will result in water stains on the instruments and cause “wet packs”.
If you have unusual staining on your instruments during sterilization contact your local instrument representative or look in our web site under staining.
5. Cold Sterilization-
Most cold sterilization solutions render instruments sterile only after a 10 hour immersion. This prolonged chemical action can be more detrimental to the surgical instruments than the usual 20 minute autoclave cycle. If the instruments need to be disinfected only, cold sterilization is recommended since disinfection will take place in only 10 minutes.
Keep in mind the difference between STERILE and DISINFECTED: Sterile- an absolute term (no living organism survives); Disinfected- basically clean.
Always use the proper sterilization/cleaning technique to render the instrument in required condition for use.
Important: For instruments with tungsten carbide inserts such as needle holders, scissors, and tissue forceps we do not recommend use of solutions containing Benzyl Ammonium Chloride. This will destroy the tungsten carbide inserts.
Related Products
ITEM DESCRIPTION
52130-00P McPherson-Vannas Spring Scissors, 8.5cm, 0.3mm tip, Straight
52130-00 McPherson-Vannas Spring Scissors, 5mm, 0.3mm tip
52130-01P McPherson-Vannas Spring Scissors, 8.5cm, 0.3mm Tip, Slt Curv
52130-01 McPherson-Vannas Spring Scissors, 5mm, 0.3mm curved tip
52130-02P McPherson-Vannas Spring Scissors, 8.5cm, 0.2mm Tip, Straight
52130-02 McPherson-Vannas Spring Scissors, 5mm, 0.2mm tip
52130-03P McPherson-Vannas Spring Scissors, 8.5mm, 0.2mm Tip, Slt Curv
52130-03 McPherson-Vannas Spring Scissors, 5mm, 0.2mm curved tip
52130-04 McPherson-Vannas Spring Scissors, 3mm, 0.2mm tip
52130-05 McPherson-Vannas Spring Scissors, 3mm, 0.2mm Curved Tip
52130-10P Vannas Spring Scissors, 8.5cm, 0.3mm Tip, Straight
52130-10 Vannas Spring Scissors, 3mm tip, 0.3mm wide
52130-11P Vannas Spring Scissors, 8.5cm, 0.3mm Tip, Slight Curve
52130-11 Vannas Spring Scissors, 3mm tip, 0.3mm wide, curved
52130-18P Vannas Spring Scissors, 8.5cm, 0.3mm Tip, Side Angled
52130-18 Vannas Spring Scissors, 3mm tip, 0.3mm wide, angled
52130-19P Vannas Spring Scissors, 8.5cm, 0.3mm Tip, Bent
52130-19 Vannas Spring Scissors, 3mm tip, 0.3mm wide, bent
52130-20P Vannas Spring Scissors, 8.25cm, 0.1mm Tip, Straight
52130-20 Vannas Spring Scissors, 3mm tip, 0.2mm wide
52130-21 Vannas Spring Scissors, 3mm tip, 0.2mm wide, curved
52130-30 McPherson-Vannas Spring Scissors, 6mm, 0.3mm tip
52130-31P McPherson-Vannas Spring Scissors, 10cm, 0.3mm Tip, Slt Curve
52130-31 McPherson-Vannas Spring Scissors, 6mm, 0.3mm curved
52130-50P Castroviejo Scissors, 9.5cm, 0.3mm Tip, Straight
52130-50 Castroviejo Scissors, 9 X 0.3mm tip, Straight, Sharp
52130-51 Castroviejo 9X.15mm Straight, S/S Sure Cut
52130-52 Castroviejo 9X0.15mm Angled S/S, One Ball Point
52130-53 Castroviejo 9X.15mm Angled S/S, Sure Cut
52130-58P Castroviejo Scissors, 9.5cm, 0.3mm Tip, Angled
52130-58 Castroviejo Scissors, 9 X 0.3mm, Angled, Sharp
52130-59 Castroviejo Scissors, 9 X 0.15mm, Angled, Blunt
52130-60 Castroviejo Scissors, 3.75 inch, Curved, Sharp
52130-61 Castroviejo Scissors, 3.75 inch, Curved, Blunt
52130-62 Castroviejo Scissors, 4.5 inch, 13mm, Angled, Blunt
52130-63 Noyes Scissors, 4.5 inch, Slight Curve, Sharp
52130-64 Noyes Scissors, 4.5 inch, Straight, Sharp
52130-64C Noyes Scissors, 4.5in, Straight, S/S, Sure Cut
52130-65 Noyes Scissors, 4.5 inch, Straight, Sharp-Blunt
52130-66 Noyes Scissors, 4.5 inch, Straight, Blunt-Blunt
52130-67 Micro Dissecting Scissors, 6 inch, Straight, 8mm X .33mm tip
52130-68 Micro Dissecting Scissors, 6 inch, Curved, 8mm X .33mm tip
52130-69 Micro Dissecting Scissors, 6 inch, Straight, 6mm X .33mm tip
52130-70 Micro Dissecting Scissors, 6 inch, Curved, 6mm X .33mm tip
52130-71 Noyes Spring Scissors, 4.75 inch, Angled on Flat, 12mm
52130-72 DeWecker Scissors, 4.25 inch, 7mm, Sharp-Sharp
52130-74 Micro-Mini Pencil Scissors, Vertical 2.5 X 0.15mm
52130-75 Micro-Mini Pencil Scissors, Horizontal 2.5 X 0.15mm
52130-76 Micro-Mini Pencil Scissors, Angled 2.5 X 0.15mm
52132-02 Micro Dissecting Scissors, 3.5 inch, Straight, 20mm, Sharp
52132-03 Micro Dissecting Scissors, 3.5 inch, Curved, 20mm, Sharp